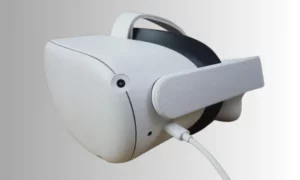
Yesterday I was playing Population: One on my Meta Quest 2 and started facing the lag issue.
Then I went to find out the exact reason why is steam VR so laggy and tried different solutions to fix them.
One of the reasons could be SteamVR lagging is migrating to Windows 11 from Windows 10.
There were a lot of wrong settings in my SteamVR like overloaded external programs, wrong game settings, and incompatible PC drivers.
In this blog, I have guided you through each and every single possible cause and fix for SteamVR games lagging and stuttering.
How To Fix Steam VR Lagging & Stuttering During Gaming
If you’ve ever experienced lagging and stuttering while gaming with your VR headset you know how it feels. The moment lag and stutter start, it takes away the gaming experience from you.
I’ve explained some steps that you can take to help reduce the amount of lagging or stuttering that occurs when using Steam for virtual reality gaming.
Adjust Your Steam VR Settings
VR Stuttering can be caused by wrong adjustment of Steam VR settings.
Those wrong adjustments can e fixed by disabling the reprojection, Bluetooth, and camera of Steam VR.
How to Disable Reprojection in Steam VR:
- Open steam on your PC.
- Go to a VR game.
- Press Shift+A to go to the Reprojection menu.
- Disable interleaved Reprojection from steam VR
How to Disable Camera in Steam VR:
- Open the steam VR app on your Computer.
- Select Settings from the menu bar.
- Find the Camera option.
- Press the Disable switch.
How to Disable Bluetooth in Steam VR:
- Open the steam VR app on your Computer.
- Select Settings from the menubar.
- Enter into the General option.
- Uncheck Enable Bluetooth Communication option.
Stop External Apps
External apps keeps running while you are playing. This way the RAM management gets hampered and the other running applications start to lag.
To remove external apps, there are two methods:
Remove from Task Manager
- Press Ctrl+Alt+Del keys together. Some security options will appear.
- Select Task Manager from the list by double-clicking on it.
- Select your External apps from the File list of the Task Manager tab
- Press the End Task button. Your selected Tasks are stopped working.
Remove from Settings
- Go to the Start menu.
- Search for the settings menu.
- Go to the Privacy option.
- Select Background Apps from the Privacy option.
- Turn off all the Background Apps.
Now the background apps has been stopped and you’re go to go.
If it is still stuttering, you should adjust the game settings.
Adjust the Game Settings
Overclocking the processor can give you a great boost. At this kind of boost you can easily play Star Wars VR games on your Oculus headset.
If your PC can handle normal gaming and you’ve adjusted the setting to go hardcore, then the adjustment is probably wrong.
Adjust some Game settings to play the VR game Perfectly.
Press Alt and double-click on the game in your Steam library.
Here are the steps to adjust the game settings:
- Disable or reduce the external monitor’s resolution.
- Reduce the game’s in-game visuals.
- Reduce the size of the spectator window.
Adjusting the game settings according to your PC’s capability will deliver more smooth gaming.
Change The Graphics Settings
Finally, if all else fails you may need to adjust the graphics settings of your game in order to reduce lag & stutter.
If you fail to do the adjustments, even games like beat saber lags on your oculus quest 2.
This can be done by reducing graphical effects like anti-aliasing or lowering resolution settings such as texture quality or shadow quality.
While these changes may not make your gaming experience as enjoyable, they can help reduce lag & stutter while playing games with a virtual reality headset.
Well, not all games require changing graphics, some games require tweaking their games files to fix lag issue. Like the Skyrim VR, i used custom shader to fix skyrim VR blurry and lag issue.
Adjust Nvidia GPU Driver Settings
If you’re running Nvidia GPU driver, there are a lot to change from the settings.
Here are the steps to adjust Nvidia GPU driver settings:
- Change Performance settings to High Performance.
- Adjust FPS settings.
- Increase display resolution.
Stop these Settings:
- Streamer Network Service
- Streamer Service
- Stereoscopic 3D Driver Service
Reason For Steam VR Lagging Issue
Settings of Steam VR:
VR stuttering is a common issue while you’re running a game by using SteamVR.
Too much unnecessary settings will make your gaming experience bad as hell.
So, avoid changing something that you are not sure of.
Overloaded External Programs:
If your PC has some unnecessary programs, then it’s better to uninstall these programs in order to optimize the performance of your virtual reality system.
Another way to increase the performance is by closing down all apps that are running in the background. This will reduce the load on the system and make more resources available for your VR gaming session.
Finally, you should also check if all of your drivers are up to date. Outdated drivers can cause a lag while playing a VR game. Updating them will help in improving the performance significantly.
Overclock Issue in BIOS:
To make sure your processor is running at the highest possible speed, you should check the overclocking settings in BIOS.
Overclocking your processor can cause instability issues, so it’s important to be careful when making any changes. To ensure optimum performance, always use the default preset for your processor.
Faulty Driver Settings:
To fix this issue, you need to update your NVidia Graphics Driver.
To do this, you must first download the latest driver from NVidia‘s official website.
Once downloaded, open the Control Panel on your computer and select “Device Manager”. Locate the graphics card driver in the list of devices installed, right-click on it and select “Update Driver”.
Follow the instructions in the driver installation wizard to successfully install the latest version of your NVidia Graphics Driver.
Once installed, restart your computer and launch the application or game you were having trouble with.
You should now be able to adjust your NVidia Graphics Driver settings to match the requirements of the application or game you are using.
If you still find that your driver settings are not adjustable after updating, then it is likely that the problem lies with your hardware.
In this case, you may need to purchase a new graphics card or GPU to use the application or game. Alternatively, you may want to contact an expert for help in troubleshooting the issue.
Wrong Game Settings:
- Resolution Settings: Wrong resolution settings can cause lag and stuttering in VR gaming.
- Refresh Rate: Set the refresh rate as per your monitor.
- Anti-Aliasing: set the anti-aliasing to a minimum or off for better performance.
- Shadows and Textures: Reduce the shadows and textures settings to get better performance.
- Anisotropic Filtering: Disable or reduce this setting for better performance
- Motion Blur: Disable or reduce the motion blur setting for better performance.


